Showing posts with label baby girl. Show all posts

Wednesday, May 4, 2011

Kate's Birthday Decor...{photo heavy}

So, it has only been about a month ago since Kate's birthday...
now I am finally posting about the whole thing.
I am a photo procrastinator on this one!

This was actually set up in my living room {for a while} until
I can do the photo shoot.  I also had to make a new set of cupcakes
to take this picture.
I covered my craft table with a canvas drop cloth.
 I used Canvas Corp Round canvas shapes and cut them in half for this scalloped edge.
Then it was easy to add the banners and butterflies.  I thought of painting the scallops, but
I thought it would be better to keep it neutral to use for other occasions. 
{2 of the butterflies are made out of Canvas Corp Corkstock}

 Would you believe that when I was taking these pictures it was storming outside?
It was pitch black. I had my boys holding lamps up for light on the side.
 Who doesn't love a great vintage scale in a tablescape?  :)
 This is a tiered shelf from Kate's room that I altered a little by adding some
embellishments.  I used all Canvas Corp patterned paper.
 I thought that it would be fun to have Kate's hands on canvas.  I used a 10"x10" Canvas Corp canvas and DecoArt paints {bahama blue and peony pink}.
 A great keepsake...
I just love using the mini clothespins to attach everything {Canvas Corp}.

  A top view of the Cupcake stand.  Canvas Corp's blank cupcake stands are soooo easy to alter.  I used Beacon Adhesive Fabric Tac to attach everything...and it works awesome. 
{to buy a cupcake stand, click here}
 It is hard to tell in this picture but I used DecoArt SoSoft fine glitter paint {ice crystal}
on the canvas mini triangle.

Materials Used:
Canvas Corp:
  Burlap Fabric Sheet, corkstock, mini clothespins, bright patterned paper line, Canvas Round shapes,   Canvas & burlap mini shapes, Cupcake Stand, 10"x10" stretched canvas, mini bags, twine, mesh

Deco Art:
  Bahama Blue, Peony Pink, SoSoft Ice Crystal

Cosmo Cricket:
  Tiny Type stickers

American Crafts:
  Ribbon, thickers


Enjoy your day!

Tuesday, May 3, 2011

Inspired by...


This is a collection of what I am inspired by this week...


How cute is this...tutorial on how to make these hanging bird cages here:  The Bride's Cafe.
Over at the Natty By Design Blog, she shares a tutorial on how to make these sweet bows. {click here}
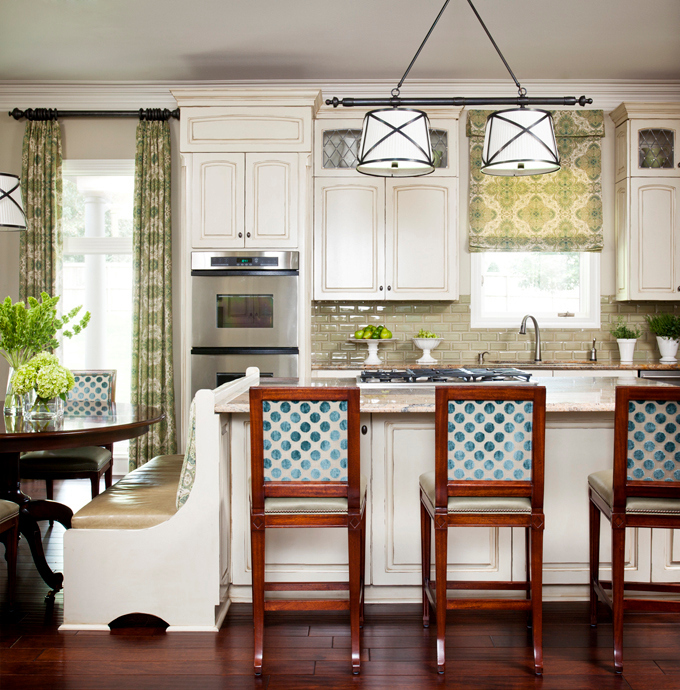
My Dream Kitchen by Tobi Fairley!  I just love everything about his room!! Is it the polka dots? Yes, and everything else!  {Click Here} Tobi is a genius with color and design...
I am really loving all of the projects using rulers lately...especially this beauty!
Lois from Frugal Decor Mom blog made this Sunburst mirror using old rulers.
I am lovin' this simple and sweet onesie that
Vanessa at V and Co. made.
She is a sewing Goddess!
Amen!
I saw this over at Flea Market Magazine Blog...{click here}
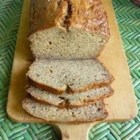
I made some Banana Bread tonight...I love the smell of it in my house...yummy!
Banana Banana Bread Recipe

Thursday, April 15, 2010

Birthday Card & a Present

My friend's birthday was last Friday {same as baby K's} and this is the card that I made for her.
{You slide the ribbon off and it opens in the middle}
Baby K was invited to Miss Ella's Birthday Tu Tu party last week and this was for Ella.
I found her gift at Hobby Lobby in the garden section; the snail, froggie and flower.
Then I used a painter marker to write her name on the little chalkboard.
I just thought it was too cute!
Have a delightful day!

Monday, April 12, 2010

Miss Kate's Birthday Party

*Come back tomorrow...I will have a FREE STITCH PATTERN that you will LOVE*

Little Miss Kate turned 1 last Friday and we had a BBQ Birthday Party on Saturday with family and friends.
I made these pom-poms and poster for the "backdrop" of her eating her cupcake!
I found out how to make these large pom-poms over at Martha Stewarts site. {Click here for the link}
My friend's daughter helped me make them on Friday night.  She already has plans to make them for her bedroom!  Seriously Fast and Easy...just the way I like it!

I used a foam core posterboard to paint her name with the birdie and tree.
The bird is made out of chipboard and I have had it forever!!  I am glad to finally use it.  I cut out a couple of fabric circles to make her "feathers".
Then I hot glued the fabric ruffles on the bottom using Tanya Whelan fabric.
I used this stamp roller to give the tree some texture.
I think that I will probably add some more items to the board and then put it in her bedroom.
I was hoping to have time to make her a dress for her birthday, but it didn't happen.
My parents are coming home from their mission tomorrow and my mom said that she would help me make her some outfits...after she gets settled of course! Yeah!
She had a fabulous time...I can't believe my baby is already 1!!!
Linked to:

Friday, April 9, 2010

Baby Diaper Cake

Here is the full picture of the diaper cake that I made this week.
I love the color combos...
All of the products that I used on the cake I bought at Hobby Lobby,
except for the diapers of course.  I used a lot of hot glue!!
The middle section is a box with a present inside.
I used a little over 50 rolled up diapers in the base.
{I put 2 rolled up diapers together in one rubberband and a few individual ones}

I used rub-on letters to spell out "Sweet Emmaline". {American Crafts}
I took off the flower from its stem to use on the chipboard and put a large rhinestone in the middle.
The flowers are made out of felt that I shaped into petals.  I curled the edges using tiny dots of hot glue to keep the shape.  Then I had to add the bling with glue glitter around the edges and a rhinestone in the middle.
If I had more time, I would've put in one more layer to the flowers...
Have a delightful weekend!
Finding Fabulous
Fingerprints on the Fridge
My Romantic Home
Cottage Instincts
The Girl Creative
The Graphics Fairy
Making the World Cuter
Keeping it Simple
Chocolate Sundaes
DIY Show off
My Frugal Family
Featured on:
on April 16, 2010
UndertheTableandDreaming
on April 9, 2010

Wednesday, April 7, 2010

Diaper Cake Topper & Bow making Tutorial

This is a little teaser picture of the diaper cake that I made for my sweet friend's baby shower last night.

I will be Guest Blogging over at LarsenLoves tomorrow where I will show you a picture of the whole cake! 
You will have to go over there and check it out!!!
JenGlamGirl from LarsenLoves will be Guest Blogging here tomorrow!!  She is amazing!

I love the name Emmaline...{baby K's middle name, a family name}
I am in love with this color of turquoise!!
I used about 3 or so yards to make the bow.  I chose a wired ribbon, so much easier to get it to form the way you want.
You can make it whatever size you want! 
The bottom piece is flat and then you go back and forth making the loops like this:
I used a little piece of twine to tie it together in the middle to hold it in place.
Then with a separate piece of ribbon, make a square knot {or whatever kind of knot that you want}. Make sure that you leave enough on each side of the side to be able to tie it around the bow.
Then you place the knot in the middle and tie it in the back.  With this bow I didn't cut the excess length of the knot and used it as a part of the bow.
This is the fun part, start "poofing" it up, play with it for a while to get the look that you are after. 
I wanted it to be extra "poofy"!!
Enjoy your day!!
Linked To:
Someday Crafts:  Whatever Wednesday
Blue Cricket Designs
My Backyard Eden: Make it yours day
The Shabby Chic Cottage
Under the Table and Dreaming

Saturday, April 3, 2010

Red Barrett Tutorial

Yesterday, Baby K wore a really cute red and white gingham shirt and then I realized that she didn't have a barrett to match {she has a red bow, but it probably won't fit her until next year}.
Another quick and easy one to make, I am sure that I will make more...
Warm up your hot glue gun!!!
Cut out 3 {or more}circles about 3" in diameter {you can do whatever size you like}
Then fold it in half...
Fold it in half again. I put a little dot of hot glue to keep it this shape.
Hot Glue them together, side-by-side.
I just covered my barrett with a red ribbon.
Just hot glue the flower on the barrett.  I actually added some tulle on the side.
Have a Beautiful Easter!!!

Friday, March 26, 2010

Easter Barretts...which one should Baby K wear?

I seriously made these 2 flower barretts in about 30 min., it would have been faster but I was designing as I went.  I was wanting your input on which one Baby K should wear for Easter. {voting on the right hand side or you can leave a comment}
Barrett #1:  Felt with satin {tutorial below with a 2nd look}
or
Barrett #2:  Satin {"burnt edges" style}
This is her simple little dress that I found at TJ Maxx for $20 {great deal for a Ralph Lauren}.
With 3 brothers, I thought this was a perfect match for pictures with them...
A little tutorial on how to make the flowers out of whatever fabric you want.  Here I used felt to make a petal as my base for Barrett #1.
2nd look at Barrett #1:


Linked to
Funky Junk's Saturday Nite Special
Photobucket
That's So Cuegly:  Craft Concoction
The Shabby Nest
It's fun to Craft
The Shabby Chic Cottage
Tatertots and Jello