Showing posts with label canvas. Show all posts

Friday, May 6, 2011

Spring Banner Wall Hanging

I made this wall hanging using Canvas Corp's 18"x18" Burlap Stretched Canvas, a perfect size for designing with the Canvas shapes.

Materials Used:
Canvas Corp: 18"x18" Burlap Stretched Canvas
Canvas Triangle Shapes
Canvas mini Hearts {the bottom was cut off and saved for another project}
2"x2" Stretched Canvases
e-flute
corkstock
1 Canvas Mini Triangle
1Canvas Mini Tag
Brights Pattern Paper Collection
Mini Clothespins
Twine
DecoArt: Paints colors: Turquoise Sparkle & Lemon Drop {Glamour Dust},
Peony Pink, Hauser Light Green,
SoSoft Fine Glitter Ice Crystal
Crystal Stickers Mark Richards: Bling
Cosmo Cricket: Tiny Type letter Stickers
Beacon Adhesives: Fabrictac
Other: Accu-cut die for the birds and label

For the scalloped border, I cut the bottom half of a Canvas mini heart shape and attached it all around to frame the pennants.
The great thing about this project is that each pennant can have is its own personality.
The key is to add layers of product for the dimension factor!
You can't go wrong with a tiny pennant on a pennant!

Have a fabulous weekend!

Saturday, April 2, 2011

Canvas Corp Banner Contest Winners...

Grand Prize Winner:
Melissa Waterbury
She just started a blog today!
Go and become a follower of hers:  http://www.distresseddainties.blogspot.com/
I love the dimension that she created in her banner...simply gorgeous!
She teaches banner classes at her local scrapbook store, you can see why...
Another view:
 2nd Place Winner
Cassie Box
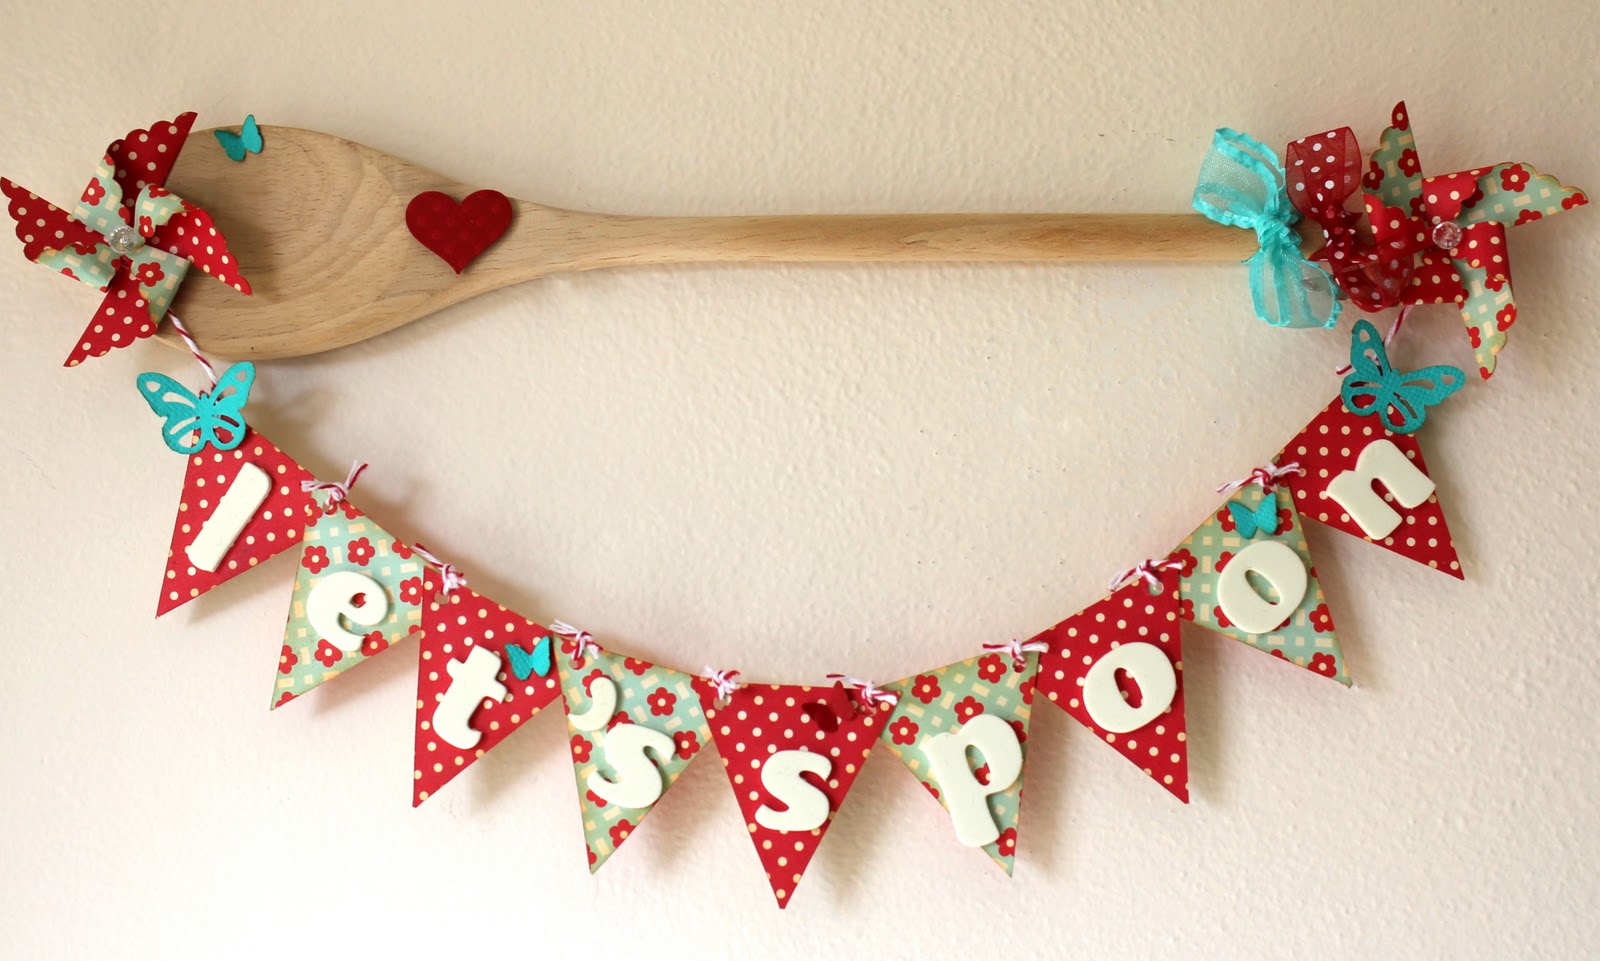
"Let's Spoon"...so cute!  This would be a darling addition to any kitchen!  I also thought when I first saw this that it would be a cute wedding gift!  Cassie also sells banners on her etsy shop, go check out all of her banner designs!
 3rd Place Winner
Malia Karlinsky
I am so inspired by Malia's colors that she used, it makes me want to go back to school!
I need to find out where she got her flashcards!
 Honorable Mention:
Mandy Beyeler
She has a darling website here:  http://www.sugarbeecrafts.com/
A computer banner, what a great idea!!  She has a tutorial on how she made
this and got it to attach to her screen.  She has tons of great ideas!
 Honorable Mention
Melissa Kaiserman
You have to go visit her at http://www.atimeforeverything.net/
Isn't this the sweetest lampshade ever! 
And yes, I will be making one of these soon!
 Honorable Mention
Jenn Erickson
This banner has sentimental value, she has the clocks on the
exact time that big events happened in her life...so inspirational!
Visit her on her website:  http://www.rookno17.com/
Now with all of the inspiration from all of the banner entries...I need to get to work!!
I will also be featuring the other gals that entered the contest.
Have a great Spring Day!

***Just to let you know, the Canvas Corp blog is temporarily down
while we are updating and giving the blog a new and fresh look. 
You can keep track of us on Facebook while we are under construction!***
We will be starting our next contest soon, so keep in touch!!

Tuesday, March 22, 2011

Bloom & Grow Banner

This is a banner that I made to attach to my fun little cabinet door that I
got at the flea market. 
It is sitting on my ledge in the entryway to greet our guests...

I made it to hopefully inspire you to enter the
Canvas Corp Banner Contest,
it ends on March 31st and they have amazing prizes for 3 lucky winners!
I used Canvas Corp Burlap and Canvas Shapes to make this.
The "l" and the 2nd "o" are on a little 2"x2" stretched canvas.
{you can click on the picture to get a better look}
Have a fabulous Spring Day!
Linked to:
Lovely Crafty Home

Saturday, March 12, 2011

A Bird's Nest

Hey, let all of your birdie friends know that I have a
"Nest For Rent".
I really do need to find a cute bird to live in it!
Any suggestions on how to make one?

I have a tutorial on how I made this nest over on the
Canvas Corp Blog {click here}.
Have a Delightful Weekend!
Linked to:

Thursday, March 10, 2011

Card Sets...a Necessity

I made these cards today...
I have a little tutorial on the Canvas Corp Blog about it
I need to replenish my card supply.  I love having homemade cards
on hand ready to go...birthdays, thank you, blank cards and etc.
I found this beauty at the Flea Market yesterday. It is amazing how
I go in there just wanting to get one thing and I come out
with a load!  I just can't help myself.
Now I just have to find the perfect place for it.
Have a beautiful day!

Monday, January 10, 2011

Hanging Magnetic Board...Mixed Media

This was my first attempt at doing Mixed Media Art. 
I have been inspired by Christy Thomlinson and her amazing creations {click here to her blog}

This project is a canvas covered magnetic board from Canvas Corp
The magnetic board came from their Make Memo line, they come framed.

 The flowers are the magnets. 
The black part of the rook is Canvas Corp's product called Chalkstock. 
You can use chalk on it!
This project definitely stretched my design process...it took a while,
but I think it turned out fun!
Canvas Corp Products that I used: 
Make Memo magnetic board, 12x12 canvas page, cork circles,
Chalkstock, Corkstock, Paper, Burlap Shapes, Clothespins, Metal hanger.
Have a fabulous Monday!!
Linked to:
Under the Table and Dreaming                      Texas Monkey
Craftomaniac                                                 Simpsonized Crafts
Sumo's Sweet Stuff                                        Between Naps on the Porch
Mad In Crafts                                                Skip to my Lou
Crafts Keep Me Sane                                    The DIY Showoff
Making the World Cuter

Thursday, June 3, 2010

Pillow Collection: Made with Canvas...

I just want to share with you 3 pillow projects that I have made.
{I found the graphics for the Welcome pillow and Chandelier pillow over at The Graphics Fairy blog, you will love her free graphics that you can download!}
This is my painted canvas pillow
{I have houndstooth on the back}.
Jen, from Tatertots and Jello, Quatrefoil stencil would be great to use on a project like this. 
I made a template of the diamond pattern and first used a sharpie to mark my lines.  Then I painted the lines in black...the lines are not perfect {I didn't want them to be}.
To get the most out of iron-on paper, I printed what I needed at the same time.
The "Welcome" sign is hot glued to the diamond painted canvas, of course I hot glued the ball fringe, too!
I made this for my sweet friend's {Leslie} birthday present! 
I took it to her and she hung it on her iron wreath stand. 
I thought that her initials on the bottom was a special touch for a present! 
I made the orange fringe out of PAPER!! 
I found a fun piece of scrapbook paper and cut out the shape {Sassafrass Lass}. 
Then I modge podged both sides to give it more of a shiny look & to make it a little more stiff.
I used double sided bias tape and sewed the paper inside the fold.  Super Easy!
Sew the layers together first before you sew the pillow together. 
 I had 3 layers here with the toile, initials and paper trim.
It was also my little sister Janis's birthday also! 
So, here is her present {it is late getting to her, so she will probably see it here first! :)}
You know when you have a great present for someone when you don't want to give it anyway! 
Both of these pillows did that to me!  But, I will be good and get this one in the mail to her...
The Scroll Label is from Rhonna Farrer and I just typed in
"Love at Home". 
You can have any saying you want in there!  The beauty of Photoshop, right!?
I used my 1 3/4" circle punch as a pattern to cut out the toile fabric for my homemade trim.
I also put Fray Check liquid on the edges to keep the fabric from fraying.
Just like the paper trim, sew the circles in the fold of the bias tape!  That's it!! :)
I also made her a barrett, using the rolled satin technique.  Of cource, I had to add a little bling to it!
I hope you enjoyed these projects, the possibilities are endless.
{I also have patterns for the diamond pillow
and the Welcome iron-on, if you would like it just leave me a
comment on my blog with your email I will send it to you.}
Have a Delightful Day!
Visit thecsiproject.com
The Graphics Fairy